
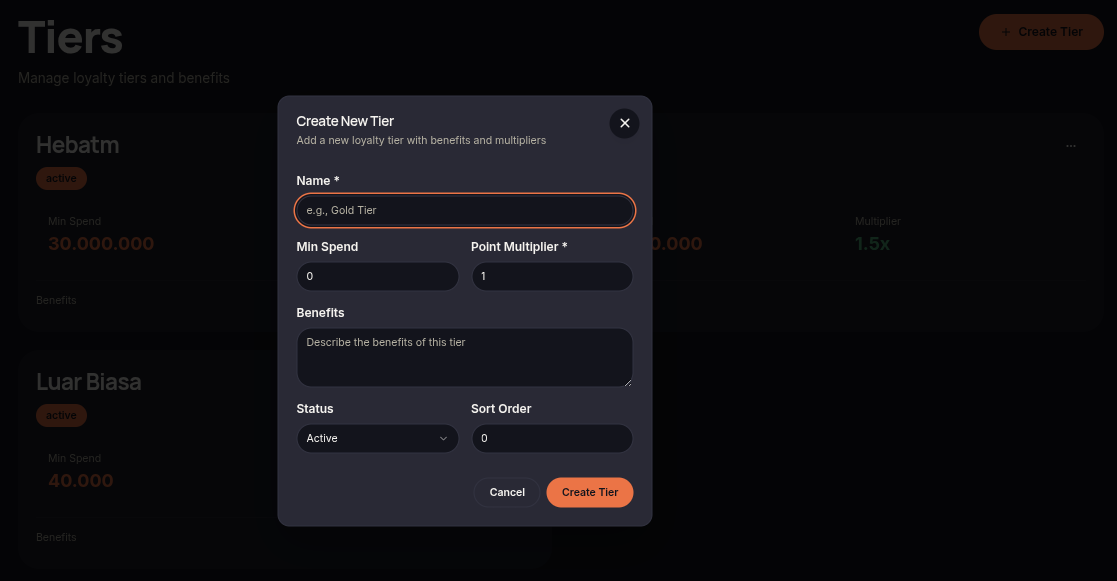
Define a tier
- Open Tiers and create a tier.
- Set its name, minimum qualifying spend, point multiplier, benefits, and status.
- Choose the qualification window and downgrade behavior.
- Save and test the result on representative customer accounts.
A lowest active tier with a minimum spend of zero is an optional starting tier for enrolled members. If all active tiers start above zero, a new member can remain without a tier until they qualify.
Choose the spend window
- Lifetime: use a zero-day window.
- Trailing days: use an exact number of recent days.
- Calendar months: count the current calendar month and the preceding N−1 months in the selected timezone. Three calendar months is not the same as 90 rolling days.
Choose downgrade behavior
Legacy preserves the prior behavior below the lowest threshold. Automatic allows a customer to become tierless. Retain uses a separate retention-spend floor. A manually assigned tier is a separate grant; use customer tier adjustment when that assignment needs to change.
The Create Tier feature allows merchants to add a new loyalty tier with its own spending requirements, benefits, and point multiplier settings.
Steps
- Open the Tiers menu.
- Click Create Tier.
- Enter the Name of the tier.
- Set the Min Spend requirement.
- Configure the Point Multiplier.
- Add information in the Benefits field if needed.
- Select the desired Status.
- Set the Sort Order.
- Click Create Tier to save the tier.
Notes
- Higher Point Multiplier values allow customers to earn more points.
- Sort Order determines how tiers are displayed in the system.
- Tiers with Inactive status will not be used in the loyalty program.